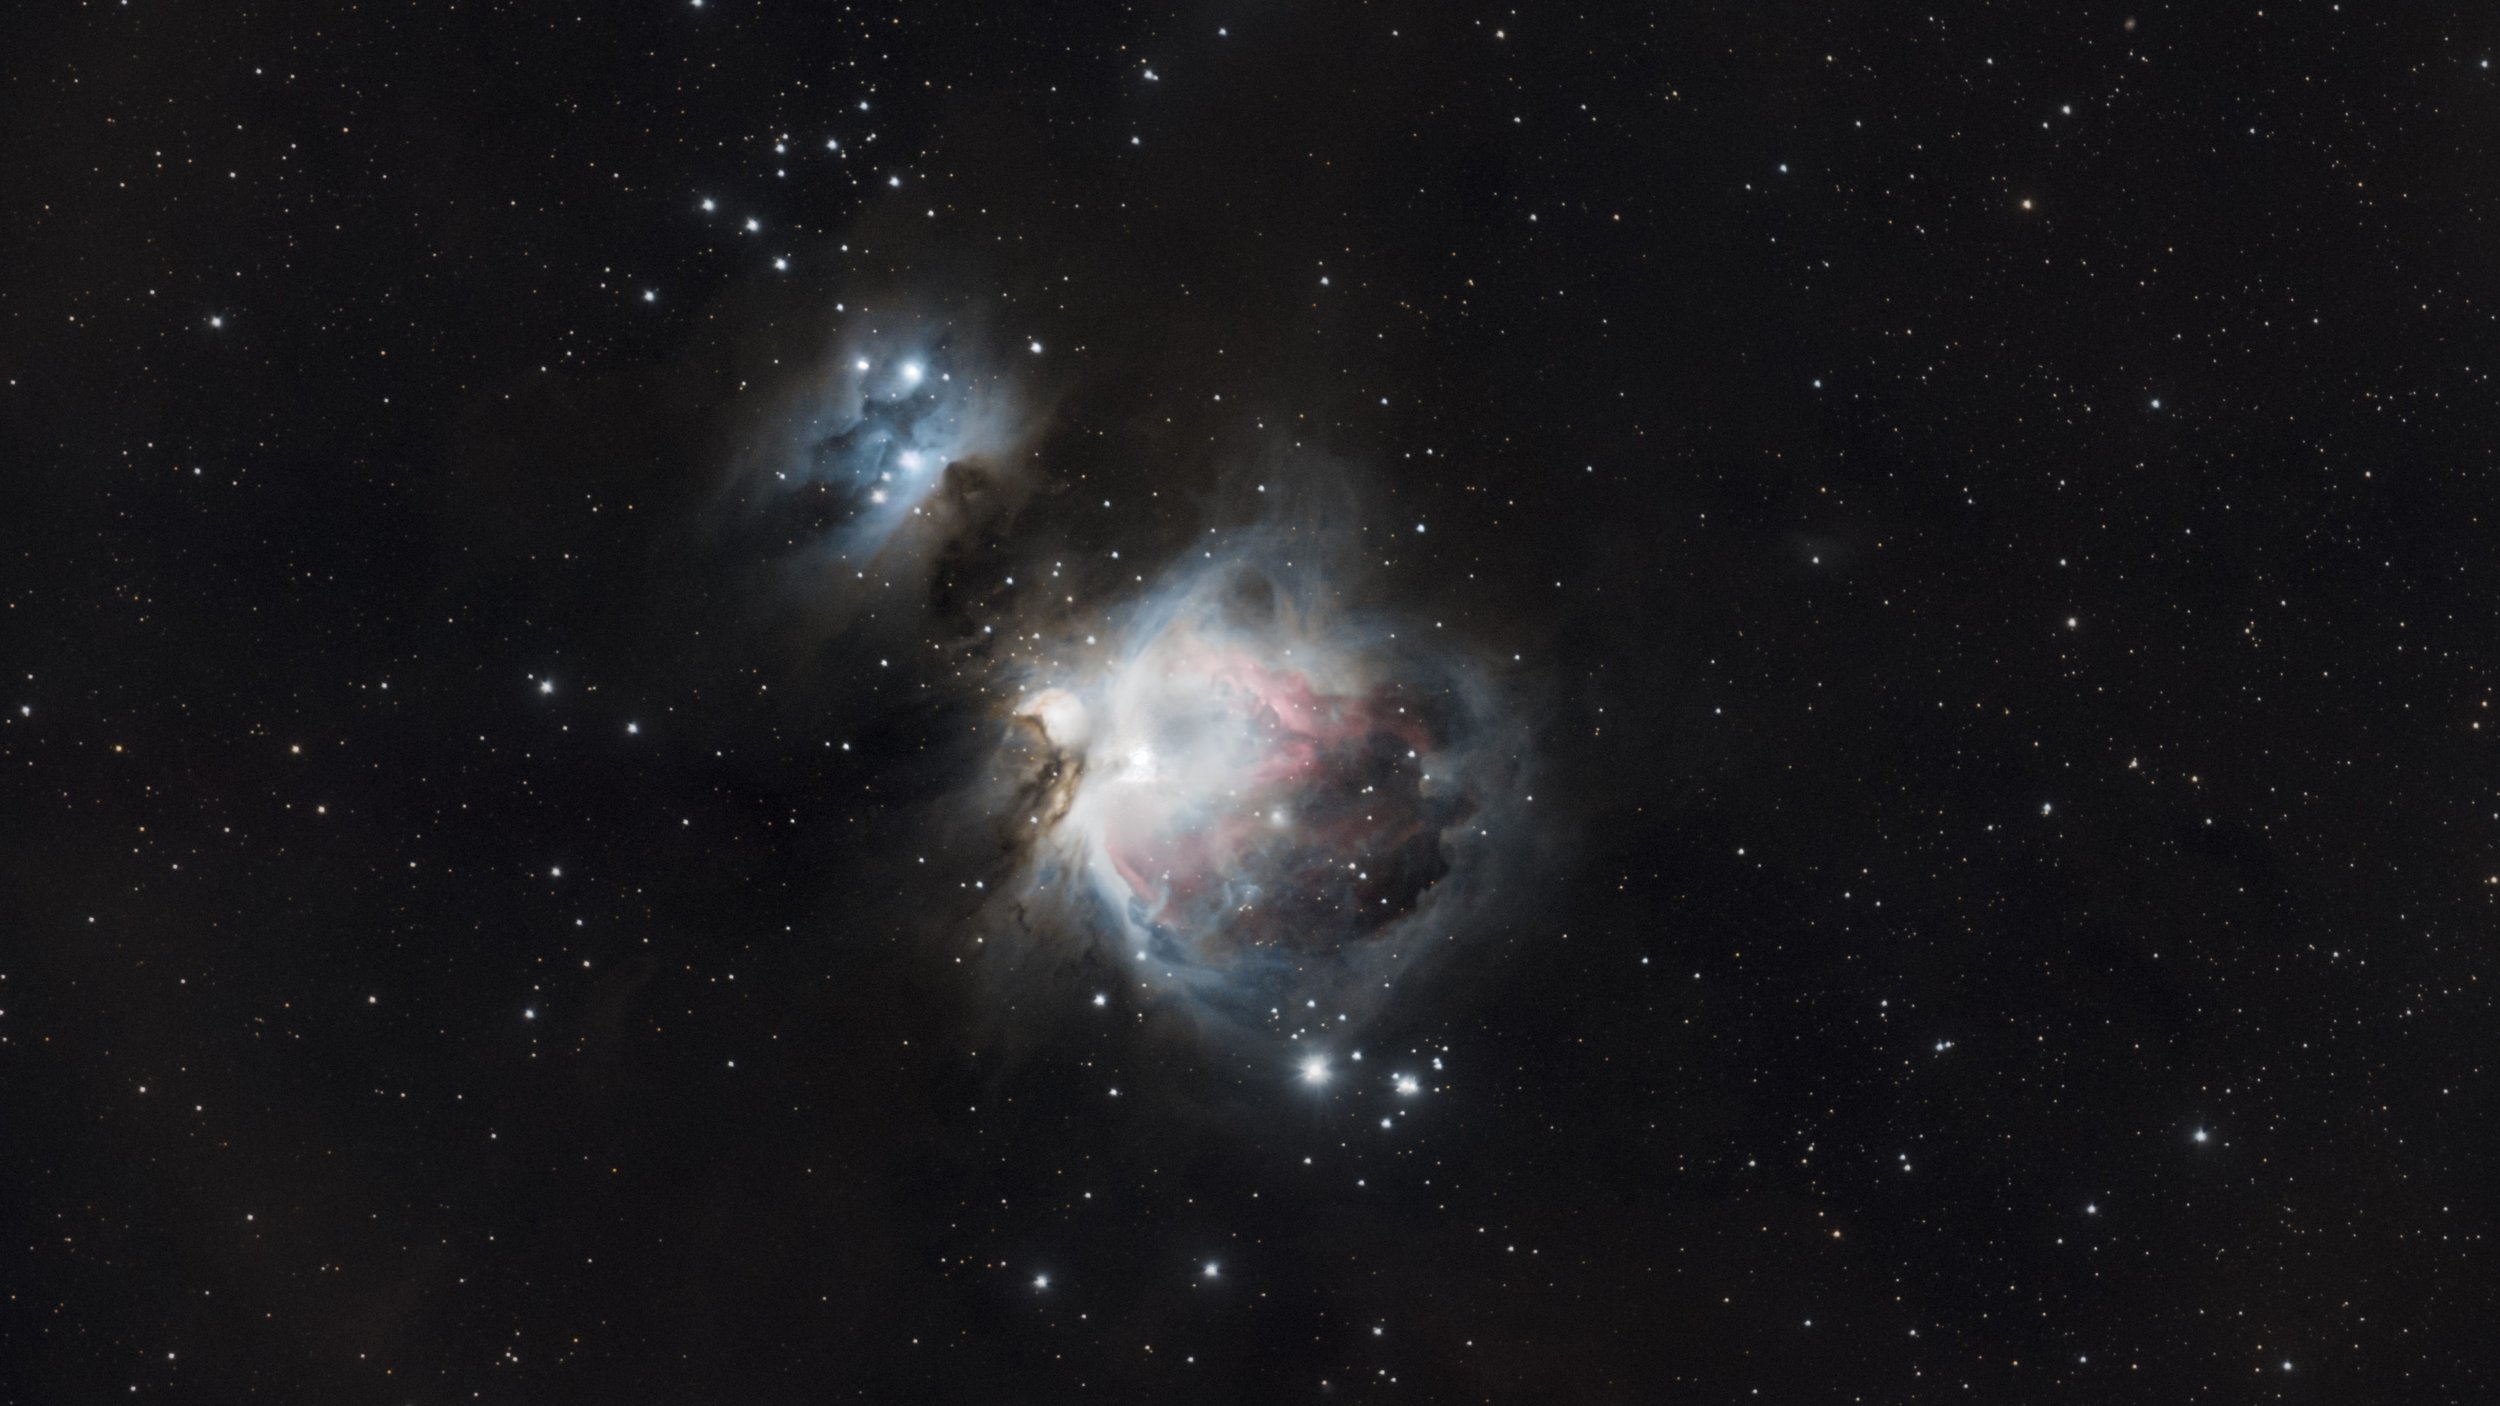
Photographing Orion from My Doorstep: A Journey with the iOptron SkyGuider Pro
Note: This post contains affiliate links. By using affiliate links, we earn a small commission when you click through / buy a product, etc. Don't worry - you don't pay any extra. It's one of the ways we might make a small sum from running this website, and keep the proverbial lights on!
To infinity and beyond
As I stepped into the cosmic realm with my iOptron SkyGuider Pro, I couldn't help but feel a mix of excitement and nostalgia. It had been a while since I last set up my star tracker, the trusty companion that opens up a portal to the wonders of the universe. Tonight's mission: capturing the ethereal beauty of Orion, a celestial body that held a special place in my heart since the early days of my astrophotography endeavors.
The journey began with a choice – what to photograph? An Instagram story from the previous day hinted at the night's quest, teasing the possibility of capturing Orion, the celestial giant. My mind traveled back to the first nebula that had captured my imagination, the one that initiated my journey into astrophotography – Orion. Tonight was about redemption, a chance to conquer the challenges that had eluded me in the past.
Contemplating the optimal gear setup, I decided to experiment with different focal lengths. The initial plan involved using the Sigma 100-400mm F5-6.3 Contemporary DG DN OS for a tight field of view. However, the weight and balance proved to be a challenge, prompting me to reconsider. Enter Telescopius, a resourceful website that guided me through the intricacies of capturing Orion at various focal lengths. Armed with newfound knowledge, I settled on shooting at 75mm, aiming to recreate a mesmerizing scene inspired by the website's simulation.
Polar Alignment with the iOptron SkyGuider Pro
Before we continue I thought it would be a good idea to give a brief overview of Polar Alignment with the iOptron SkyGuider Pro.
Polar alignment is an essential step in ensuring precise tracking of celestial objects during long-exposure imagery with the iOptron SkyGuider Pro for astrophotography in the Northern Hemisphere. This is a summary specific to this configuration:
Find Polaris: If you are in the Northern Hemisphere, the North Star, Polaris, is your objective. Start by orienting your SkyGuider Pro's polar axis roughly in the direction of Polaris.
Establish the Mount: Ensure that the SkyGuider Pro is level and positioned on a sturdy surface.
The Polar Scope: A built-in polar scope is included with the SkyGuider Pro. Examine it and adjust the azimuth and height of the mount until the reticle of the polar scope lines up with Polaris.
Alignment Refinement Using Adjustment Knobs: Use the mount's adjustment knobs to fine-tune the polar alignment. In order to reduce tracking errors during long-exposure photography, this step is essential.
Think about Polaris Offset: Remember that although Polaris is a useful guide, it is not located exactly at the North Celestial Pole. When aligning, take this small offset into consideration.
Check for Alignment: To confirm that your SkyGuider Pro is precisely following the night sky, double-check the polar alignment and, if you can, take test photos.
Sharp and detailed photos can only be obtained with precise polar alignment using the iOptron SkyGuider Pro. You may confidently take beautiful astrophotography with regular practice and patience, which will eventually assist to streamline the procedure.
View through the polar scope
Here is what is looks like when you look through the Polar Scope on the iOptron SkyGuider Pro. Its important to line up Polaris to the correct location as shown on your app.
Changing back to the Sigma 100 - 400mm Lens
After shooting at 75mm using the Tamron 28-75mm F/2.8 Di III lens I decided that I wasn’t happy enough with the framing etc. So I am thrilled to say that after a second try I managed to get the Sigma 100 - 400mm lens balanced. With the gear selected and balanced, the next step was to await Orion's appearance. Standing just outside my doorstep, the convenience of the location added a layer of excitement. The idea of photographing Orion without venturing far from home was a challenge that piqued my interest.
As the night unfolded, my focus turned to polar alignment. Armed with the smartphone app PolarAligner Pro, I located Orion in the night sky and identified Polaris, the North Star, a critical reference point for precise alignment. The challenge intensified as Polaris would be behind me for the first time during this shoot, requiring adjustments and a keen eye.
My mind is blown looking at the camera
After successful polar alignment, the moment of truth arrived. The camera, now armed with the chosen settings, aimed at Orion. Two minutes of exposure captured the essence of the nebula in a single frame. The sense of accomplishment and awe was palpable as I marveled at the image on my camera's display.
Excitement bubbled within me as I set the camera for an extended session, planning to capture a sequence of images over the next few hours. The prospect of witnessing the night sky's evolution from my doorstep filled me with anticipation. Despite facing a momentary setback with lens condensation, the final image exceeded my expectations.
The joy, astonishment, and gratitude for the moment was simply magical. The image of Orion, resplendent in its celestial glory, was a testament to the possibilities unlocked by the iOptron SkyGuider Pro.
The journey to photograph Orion from my doorstep had not only been a technical triumph but also a deeply personal one. The cosmos had opened its gates, revealing the magic that awaited those who dared to explore its mysteries. The iOptron SkyGuider Pro had proven to be a key to unlocking the wonders of the universe, and I eagerly await the next chapter in my astrophotography adventures.
If you would like to see more from behind the lens you can read more below.
Take it easy, cheers


